How to Clean Your Grease Trap
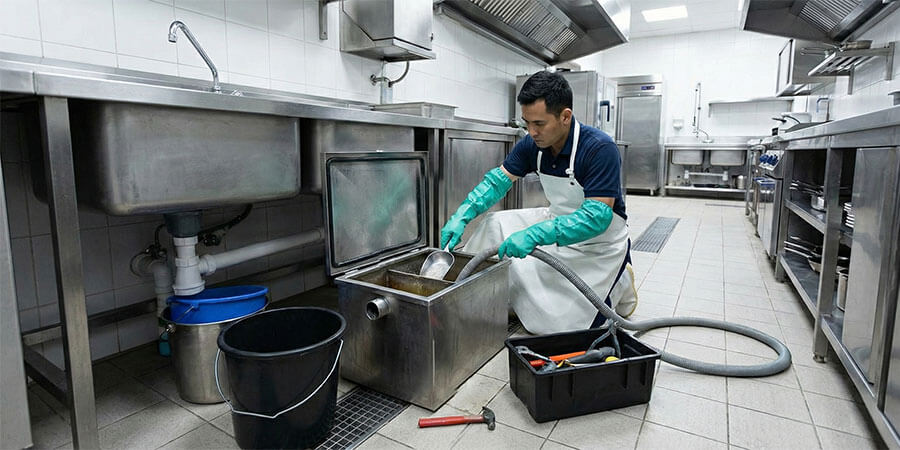
Table of Contents
Step-by-step grease trap cleaning instructions, maintenance schedules, and compliance tips for commercial kitchens
A properly maintained grease trap prevents drain clogs, eliminates odors, and keeps your kitchen compliant with local FOG (fats, oils, grease) regulations. Most commercial kitchens should clean their grease trap every 1-3 months, or when grease fills 25% of the trap's capacity. This guide covers the complete cleaning process, maintenance schedules, and when to call a professional.
Grease traps are essential plumbing devices that capture fats, oils, and grease (FOG) before they enter your drain lines. When FOG cools, it solidifies and coats the inside of pipes, leading to clogs, sewage backups, foul odors, and expensive plumbing repairs.
Regular grease trap cleaning protects your plumbing, keeps your kitchen smelling fresh, and ensures compliance with local health and environmental regulations. Most municipalities require commercial kitchens to maintain grease traps and keep cleaning records for inspection.
This guide walks you through the complete grease trap cleaning process, from safety preparation to reassembly.
Safety First
Grease trap cleaning involves exposure to bacteria, gases, and slippery surfaces. Take these precautions before starting:
Required Personal Protective Equipment (PPE):
- Rubber gloves (heavy-duty, elbow-length recommended)
- Safety goggles or face shield
- Waterproof apron or coveralls
- Rubber boots or waterproof shoe covers
- Face mask or respirator (hydrogen sulfide gas can accumulate)
Safety Precautions:
- Work in a well-ventilated area or ensure exhaust fans are running
- Never smoke or use open flames near an open grease trap
- Keep a first aid kit nearby
- Have another person aware you're performing the cleaning
- If you smell strong sulfur (rotten egg) odor, ventilate the area before proceeding
Tools and Supplies Needed
Gather these items before you begin:
Tools:
- Pry bar or crowbar (for lid removal)
- Measuring stick or dowel rod
- Heavy-duty scraper or putty knife
- Shop vacuum (wet/dry) or pump
- Buckets (5-gallon recommended)
- Stiff-bristle scrub brush
- Garden hose or pressure washer
Supplies:
- Commercial drain cleaner or degreaser
- Dish soap
- Absorbent pads or cat litter (for spills)
- Heavy-duty trash bags
- FOG disposal container (check local regulations)
How to Clean a Grease Trap: 7 Steps
Step 1: Remove the Lid Carefully
Slowly pry off the grease trap lid using a crowbar or pry bar. Work around the edges evenly to avoid bending the lid or damaging the gaskets.
Important: Gaskets create an airtight seal that prevents odors from escaping. Inspect gaskets for cracks or wear and replace if damaged.
Set the lid aside on a stable surface where it won't get damaged or create a tripping hazard.
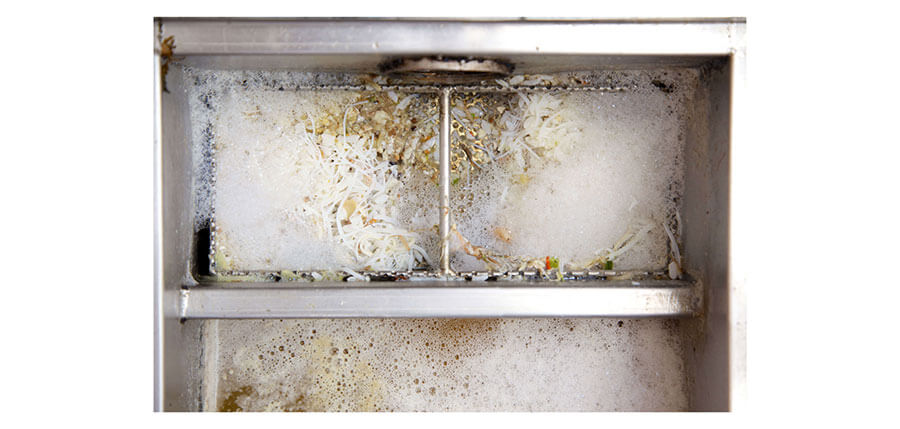
Step 2: Measure and Record Grease Levels
Before removing any contents, insert a measuring stick or wooden dowel straight down into the trap. Measure the depth of the grease layer floating on top.
Why this matters: Many municipalities require FOG reports documenting grease levels at each cleaning. This record demonstrates compliance during health inspections and helps you determine optimal cleaning frequency.
Record the measurement with the date in your maintenance log.
Step 3: Remove Standing Water
Using a shop vacuum or small pump, remove the water from the grease trap. Transfer it to buckets or a holding tank.
Save this water. You'll return it to the trap after cleaning. The water creates a seal that prevents sewer gases from entering your kitchen.
Step 4: Scoop Out the Grease
Using a heavy-duty scoop, bucket, or shop vacuum, remove all accumulated grease and solid waste from the trap. Work systematically:
- Start with the floating grease layer on top
- Remove solid food particles from the bottom
- Scrape grease from the sides, baffles, and lid interior
- Check inlet and outlet pipes for buildup
Place all waste in a sealed container for proper disposal. Never pour grease down any drain or into regular trash.
Step 5: Scrub All Surfaces
With the bulk of the grease removed, scrub the entire interior:
- Use a stiff-bristle brush with dish soap or commercial degreaser
- Clean the lid, sides, bottom, and all baffles thoroughly
- Scrub the inlet and outlet screens
- Remove any remaining residue from corners and crevices
Rinse with clean water, collecting the rinse water for proper disposal.
Step 6: Replace the Water
Pour the water you saved in Step 3 back into the grease trap. This water barrier is essential for:
- Preventing sewer gases from entering your kitchen
- Allowing the trap to begin capturing FOG immediately
- Maintaining proper trap function
If you discarded the original water, add fresh water until it reaches the normal operating level (typically indicated by the outlet pipe).
Step 7: Reinstall the Lid and Verify the Seal
Place the lid back on the grease trap, ensuring it sits evenly on all sides. Check that:
- Gaskets are properly seated
- The lid creates an airtight seal
- No gaps allow odors to escape
- Fasteners or locks are secured (if applicable)
Run water from a nearby sink to verify the trap is draining properly.
How Often Should You Clean Your Grease Trap?
Cleaning frequency depends on your kitchen's FOG production, trap size, and local regulations.
The 25% Rule
The industry standard is the "one-quarter rule": clean your grease trap when FOG fills 25% of the trap's capacity. Beyond this level, the trap loses efficiency and may allow grease to pass through to your drain lines.
Recommended Cleaning Schedule by Kitchen Type
| Kitchen Type: | FOG Production: | Recommended Frequency: | Recommended Frequency: |
| Light cooking (cafes, delis) | Low | Every 2-3 months | Every 2-3 months |
| Full-service restaurants | Moderate | Monthly to every 6 weeks | Monthly to every 6 weeks |
| High-volume frying (fast food, fried chicken) | High | Every 2-4 weeks | Every 2-4 weeks |
| Commercial bakeries | Low-Moderate | Every 6-8 weeks | Every 6-8 weeks |
| Hotel kitchens | High | Every 2-4 weeks | Every 2-4 weeks |
Factors That Increase Cleaning Frequency
- Smaller trap size
- Menu heavy in fried foods
- High daily meal volume
- Older or less efficient trap design
- Hot weather (grease accumulates faster)
Grease Trap Maintenance Schedule
Beyond regular cleaning, follow this maintenance schedule to keep your trap functioning properly:
| Task: | Frequency: | Notes: |
| Check grease levels | Weekly | Use measuring stick; record in log |
| Inspect for odors | Daily | Strong odors indicate overdue cleaning |
| Clean screens/strainers | Weekly | Prevents large solids from entering trap |
| Full cleaning | 1-3 months | Based on 25% rule and kitchen volume |
| Inspect gaskets and seals | Monthly | Replace cracked or worn gaskets |
| Professional inspection | Annually | Identifies wear, damage, or sizing issues |
Signs Your Grease Trap Needs Immediate Cleaning
Don't wait for your scheduled cleaning if you notice these warning signs:
- Slow draining sinks in the kitchen area
- Foul odors coming from drains or the trap area
- Grease visible in sink drains or on the floor near the trap
- Gurgling sounds from drains
- Fruit flies or drain flies around sink areas
- Failed inspection or warning from health inspector
When to Call a Professional
While routine cleaning can be done in-house, certain situations require professional grease trap services:
Call a licensed grease trap service when:
- Your trap exceeds 500 gallons capacity
- You're unable to access or remove the lid safely
- The trap is located underground or requires excavation
- You need certified FOG disposal documentation
- Local regulations require licensed pump-out services
- You notice structural damage, cracks, or leaks
- Persistent odors continue after thorough cleaning
Professional services typically cost $150-$500 depending on trap size and location. Many municipalities require professional pump-outs at specified intervals regardless of in-house cleaning.
FOG Compliance and Record Keeping
The EPA and local municipalities regulate grease trap maintenance to protect sewer infrastructure. Non-compliance can result in fines, business closures, and liability for sewer damage.
What to Document
Maintain a grease trap cleaning log that includes:
- Date of each cleaning
- Grease depth measurement before cleaning
- Who performed the cleaning
- Disposal method and location
- Any repairs or issues noted
- Professional service receipts (if applicable)
Common Compliance Requirements
While regulations vary by location, most jurisdictions require:
- Grease traps for all commercial food preparation facilities
- Regular cleaning (typically quarterly minimum)
- Proper FOG disposal through licensed haulers
- Maintenance records available for inspection
- Grease trap sized appropriately for your operation
Contact your local water authority or health department for specific requirements in your area.
Frequently Asked Questions
How do I know if my grease trap needs cleaning?
Check grease levels weekly using a measuring stick. Clean when grease fills 25% of trap capacity, or immediately if you notice slow drains, foul odors, or grease backing up into sinks. Most commercial kitchens need cleaning every 1-3 months.
Can I use chemicals to clean my grease trap?
Avoid using solvents, emulsifiers, or enzymes that claim to "dissolve" grease. These products push FOG further into your plumbing rather than removing it, causing blockages downstream. Use only dish soap or approved degreasers for scrubbing, and physically remove all grease.
How do I dispose of grease trap waste?
Grease trap waste must be disposed of through licensed FOG haulers or at approved facilities. Never pour grease down drains, into storm drains, or regular trash. Many cooking oil recyclers also accept grease trap waste. Keep disposal receipts for compliance records.
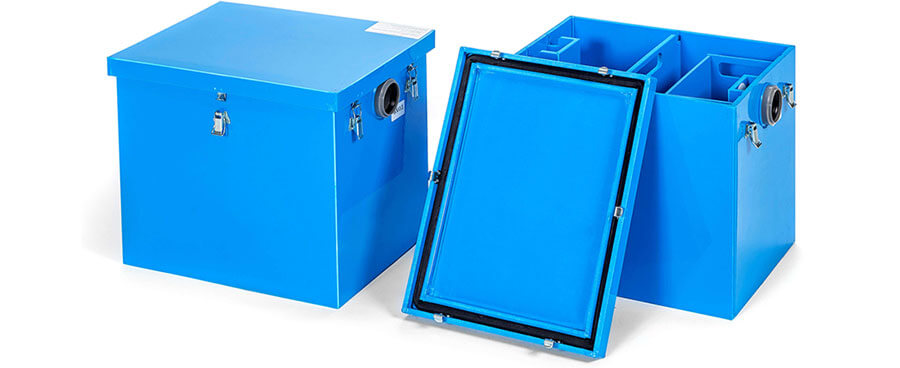
What's the difference between a grease trap and grease interceptor?
Grease traps are smaller units (typically under 100 gallons) installed under sinks or in the kitchen. Grease interceptors are larger units (500+ gallons) installed underground outside the building. Both serve the same purpose but differ in capacity and installation. Your local code determines which you need based on your operation size.
How much does professional grease trap cleaning cost?
Professional cleaning typically costs $150-$500 depending on trap size, location, and your area. Large underground interceptors cost more due to pump truck requirements. Many restaurants schedule professional service quarterly and perform maintenance cleaning in-house between visits.
What happens if I don't clean my grease trap?
Neglected grease traps cause drain backups, sewage overflows, pest infestations, and health code violations. You may face fines from your municipality, liability for sewer line damage, forced closure during repairs, and negative health inspection scores that become public record.
Can I clean my grease trap myself or do I need a professional?
Small under-sink traps (under 100 gallons) can typically be cleaned in-house following the steps in this guide. Large underground interceptors usually require professional pump trucks. Check your local regulations, as some areas require licensed service regardless of trap size.
How do I reduce grease buildup between cleanings?
Scrape plates and cookware before washing to keep solids out of drains. Never pour cooking oil or grease down sinks. Use sink strainers to catch food particles. Wipe greasy pans with paper towels before washing. Train staff on proper FOG disposal practices.
Related Guides
- Floor Troughs & Drains - Manage water drainage in commercial kitchens
- Commercial Dishwashers - Dishwashers for commercial kitchens
- Janitorial Supplies - Cleaning supplies for commercial kitchens
Shop Grease Traps and Maintenance Supplies
Keep your kitchen compliant and drains flowing with the right equipment:
- Grease Traps & Interceptors - Code-compliant grease interceptors for every kitchen size
- Drain Cleaners & Openers - Commercial-grade drain maintenance products
Share This!