Commercial Range Cleaning Guide: Daily Routine + Deep Clean Checklist
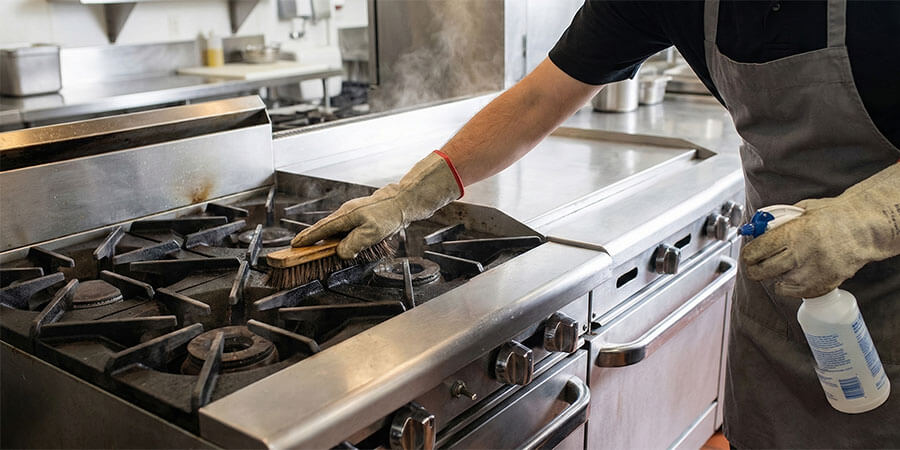
Table of Contents
Keep Your Range Safer, Cleaner, And More Reliable With A Routine That Covers Grates, Burners, Knobs, And Ovens
A commercial range gets dangerous and inefficient when grease, carbon, and debris build up in the wrong places. This guide gives you a realistic daily routine, a weekly and monthly checklist, and safety rules for choosing cleaning chemicals without damaging metal surfaces.
If a range is not cleaned daily, the kitchen pays for it twice: once in safety risk and once in performance loss. Grease and carbon buildup can reduce efficiency, create flare-up risk, and turn normal cleaning into a multi-hour job.
This post is written to be brand-neutral. Use it as a structure, then follow your range manufacturer instructions for any model-specific steps.
Know What You Are Cleaning: Range Top, Oven, Or Both
Many "range cleaning" problems happen because the team cleans the visible top but ignores the parts that drive performance and safety.
Break the unit into zones:
- Cooktop zone: grates, burner areas, ledges, and spill zones.
- Control zone: knobs, handles, doors, and touch points.
- Oven zone: doors, racks, and interior surfaces that collect carbon.
- Under and behind: where debris and grease migrate over time.
If you define these zones in training, staff stop guessing about what "clean" means and you stop finding the same missed areas every week.
Start With Safety And Chemical Handling
Commercial range cleaning involves heat, sharp edges, and chemicals. Most problems come from rushing the first five minutes.
- Confirm the range is safe to touch. Never clean while equipment is on.
- Ventilate. Degreasers and cleaners can irritate eyes and lungs.
- Use PPE appropriate to the product label and SDS. OSHA Hazard Communication rules exist because kitchen chemicals can cause burns and respiratory harm (OSHA, 1910.1200).
- Do not mix chemicals. Mixing products can create dangerous gases (OSHA; CDC, 2024).
For general cleaning/disinfecting principles and why mixing is unsafe, CDC emphasizes following label directions and not mixing products (CDC, 2024). If a product makes disinfecting or sanitizing claims, those claims are governed by EPA labeling requirements (EPA, 2026).
Build A Daily Range Cleaning Routine (Close Or Between Shifts)
Daily cleaning prevents the deep-clean backlog. The goal is not perfection. The goal is a repeatable standard.
Start with the surface and spill zones
Wipe splatter and surface grease first. This makes everything else easier.
Remove debris that turns into carbon
Crumb trays, drip zones, and ledges collect debris. When you ignore these areas, the debris bakes on and becomes much harder to remove.
Grates and removable parts
If your workflow allows it, soak removable parts in hot water with detergent to loosen grease. Then scrub with non-damaging tools and rinse thoroughly.
Knobs, handles, and touch points
Touch points look clean until they do not. These areas are where grease film builds up and attracts more soil.
Oven doors and the first few inches inside
You do not need to deep scrub the entire oven interior nightly, but you do need to remove visible soil and grease where it builds up fastest: the door, the threshold, and the most-used surfaces.
Use A Checklist Your Team Can Actually Follow
If you want consistent cleaning, make it easy to verify. This checklist is designed to be printed and initialed.
| Frequency: | Task: | Owner: | Initials: | Notes: |
| Daily | Wipe cooktop surfaces and backsplash; remove loose debris | |||
| Daily | Clean knobs, handles, and front ledges (grease film) | |||
| Daily | Empty and wipe crumb trays / drip areas (if present) | |||
| Daily | Scrub grates and remove baked-on soil as needed | |||
| Daily | Check under/around the range for grease and debris | |||
| Weekly | Remove grates/burners (as applicable) for a deeper clean | |||
| Weekly | Inspect burners and ports for clogs; address early | |||
| Weekly | Clean oven doors and the most-used interior surfaces | |||
| Monthly | Deep clean hard-to-reach grease areas (behind panels where safe) | |||
| Monthly | Verify staff are using the correct tools/chemistry (no damage) |
If you want a similar checklist approach for other equipment, the structure in Ice Machine Maintenance Checklist is a good model to replicate.
Choose The Right Cleaner For The Surface (And Avoid Common Damage)
Ranges are usually a mix of stainless, cast iron, porcelain enamel, and sometimes aluminum or coated components. That means there is no universal "best" cleaner.
Use this table to avoid mismatching chemistry to material.
| Range Area / Material: | What Usually Works: | What To Be Cautious With: |
| Stainless areas and exterior | Warm detergent wash, rinse, dry; non-scratching tools | Leaving chemicals sitting on the surface; aggressive abrasives that scratch |
| Cast iron grates | Detergent wash and scrub; dry completely; re-oil lightly if needed | Long soaking and storing damp (rust risk) |
| Porcelain enamel oven interior | Warm detergent wash; gentle tools; follow manufacturer guidance | Abrasives that scratch and create permanent rough spots |
| Burner areas and ports | Careful cleaning and inspection; address clogs early | Forcing tools into ports; breaking components |
| Grease-heavy zones | Degreasing step first, then wash/rinse | Using harsh chemistry without label/SDS alignment or PPE |
If you are sourcing supplies, start with food-equipment-intended categories like Food Equipment Cleaners, Descalers, and Degreasers and Janitorial Supplies, then choose products that match your surfaces and your safety program.
If your team keeps reaching for whatever is closest, make cleaner choice part of the station setup: label bottles, standardize tools, and remove the products you do not want used on the range.
Deep Cleaning Without Turning It Into A Shutdown
Deep cleaning goes wrong when it is treated as "everything at once" instead of a controlled scope.
Use a simple approach:
- Choose one or two areas to deep clean each week.
- Use your checklist to document completion.
- Train staff on what not to do (especially harsh abrasives and chemical mixing).
When you deep clean, keep one more goal in mind: return the range to a predictable baseline. If staff do not know what "good" looks like, they will keep re-cleaning the same areas and missing others. A weekly deep-clean slot also gives you time to spot small issues early (loose knobs, worn gaskets, uneven flames, or buildup in corners) before they become service interruptions.
If you have a griddle or flat-top in the same line, follow a separate process designed for that surface. This guide can help: How to Clean a Commercial Griddle.
If you need to go deeper behind panels or around ignition components, follow your manual and your safety procedure. If your process requires service access or adjustment, treat it as a technician task.
Reduce Grease Buildup With Small Habits
Cleaning is easier when the line avoids unnecessary mess.
- Wipe spills quickly instead of letting them bake.
- Use splash control where possible.
- Do not let debris accumulate in ledges and corners.
- End each shift with a defined reset so the next shift starts clean.
If the range is consistently getting out of control, treat it as a workflow signal: either the station does not have enough time built into close, or the tools and chemicals are not set up to make the right behavior easy.
For a kitchen-wide cleaning rhythm, see 9 Easy Commercial Kitchen Cleaning Tips for a Spotless Kitchen.
Gas Vs Electric: Small Differences That Change Cleaning
The cleaning principles are the same, but the risk points are different.
Gas ranges
- Burner areas, ports, and ignition zones are more sensitive to debris and grease.
- Clogged ports can change flame patterns and performance.
- If a spill zone is repeatedly ignored, buildup can harden into carbon and become a safety and maintenance issue.
Electric ranges and hot plates
- Heating surfaces can still build baked-on soil, but the layout differs.
- Some components are more sensitive to liquid intrusion.
- If removable parts exist, follow the manual for what is safe to remove and how to reinstall.
For both types, the most important rule is the same: do not improvise disassembly. Clean what is designed to be cleaned by staff, and treat deeper access and adjustments as service work.
Train The Routine And Verify It
If cleaning quality varies by who closed, you do not have a process. You have good intentions.
A quick test: if two different closers produce two different results, your checklist needs to be more specific or your tools need to be standardized.
Make the routine repeatable:
- Post the checklist at the range.
- Standardize tools (one approved brush type, one approved non-scratching pad type, one approved degreasing step).
- Train what "done" looks like with photos or a short walk-through.
- Have a manager verify the top two failure areas nightly (usually touch points and spill zones).
This is also where you prevent damage. When staff are unsure, they tend to over-scrub with the wrong tool or over-apply chemicals. Clear rules protect the range finish and reduce rework.
Frequently Asked Questions
How do I clean a commercial range every day without it taking forever?
Use a consistent sequence: surface wipe and debris removal first, then grates/removable parts, then touch points and ledges, then a quick final rinse and dry. The key is preventing buildup so you are not fighting carbon every night.
What is the safest way to handle degreasers and cleaners?
Follow the product label and SDS, ventilate, wear appropriate PPE, and do not mix chemicals. OSHA Hazard Communication rules require access to SDS and worker training because these products can be corrosive and irritating.
Should I clean the range while it is still warm?
Warm surfaces can make grease easier to remove, but safety comes first. Clean only when the equipment is off and safe to touch. Never clean while a range is operating.
How often should I deep clean burners and hard-to-reach areas?
Build a weekly and monthly cadence into your checklist and adjust based on volume and grease load. If burners are clogging, flames look uneven, or performance is dropping, tighten the schedule and address the root cause.
What causes the sticky brown film on range surfaces?
It is often polymerized oil and grease film. Degreasing first and wiping during service can prevent it from baking into a hard layer.
What should I avoid when cleaning stainless or enamel surfaces?
Avoid aggressive abrasives that scratch and avoid leaving chemicals sitting on the surface. Scratches make surfaces harder to clean over time and can create permanent dull spots.
Related Resources
- Commercial Range Buying Guide - Range types and selection criteria
- Range Top Configuration Guide - Choose a layout that fits workflow
- Commercial Restaurant Ranges - Browse range configurations
- Food Equipment Cleaners, Descalers, and Degreasers - Cleaning supply categories for kitchen equipment
- How to Clean a Commercial Griddle - Separate surface-specific griddle process
Share This!